
Oracle Big Data Lite VM with Amazon EC2
Published on: Author: Joost Voordouw Category: Data ScienceAlways wanted your own Oracle Big Data Lite VM in the (Amazon) Cloud? This is your chance! I like to show you how to set up your own Big Data Discovery environment at Amazon EC2, with Oracle Big Data Lite Virtual Machine Version 4.2.1.
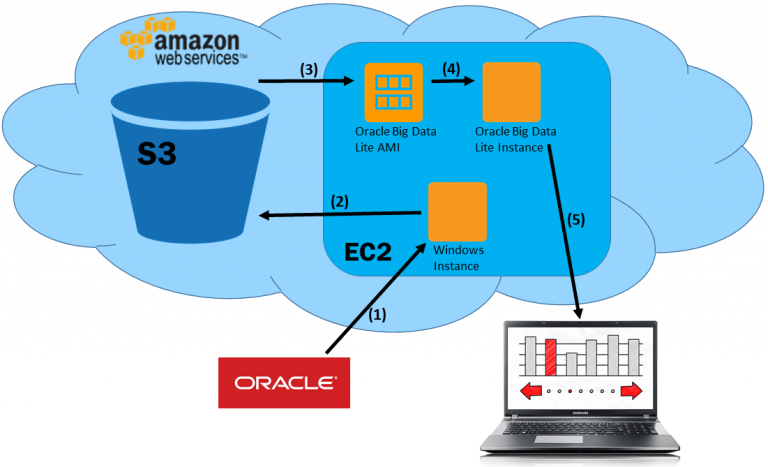
The figure above shows a basic overview of the steps we will take:
- We start with downloading the VM from the Oracle website and setting up a temporary Windows instance in EC2. Using this setup we don’t have to upload large files via our own connection.
- We then send our VM files directly to Amazon.
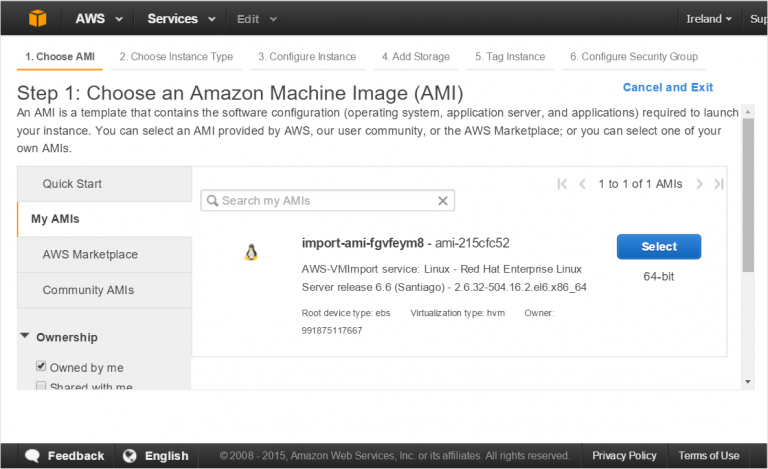
- We import the Oracle Big Data Lite VM into Amazon EC2 (where it becomes an AMI).
- We launch our brand new AMI.
- We then start the services that we want to use and login.
Download Oracle Big Data Lite VM
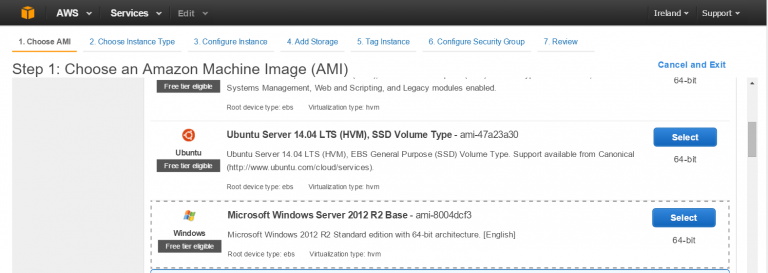
We want to download the Oracle VM directly to the Amazon EC2 cloud. Therefore we use a (free tier) Windows machine to accomplish this. After creating our Amazon account, we select EC2 and click ‘Launch Instance’.
Step 1: Choose the ‘Windows Server 2012 R2 Base’ AMI:
Step 2 and 3: Click ‘Next’ (use the default instance type).
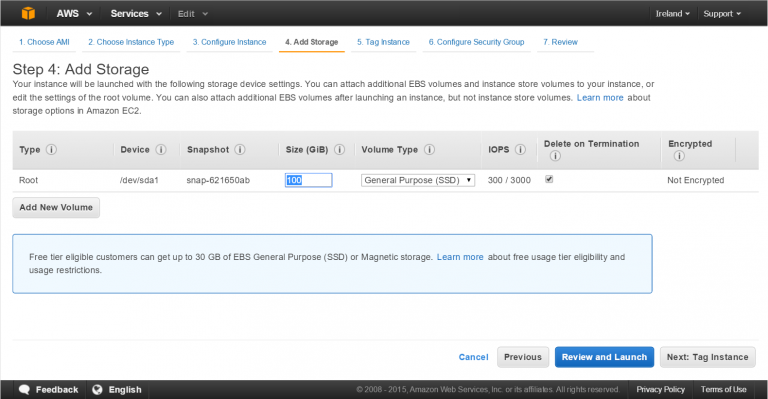
Step 4: Add 100 GiB of storage. We need this storage later for unzipping our download:
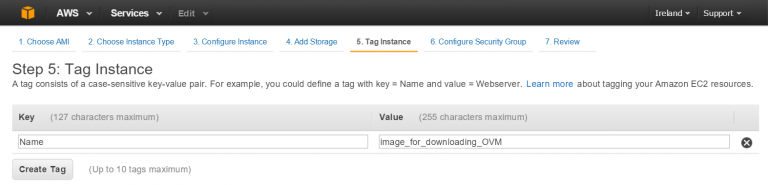
Step 5: Optionally, we can tag our instance:
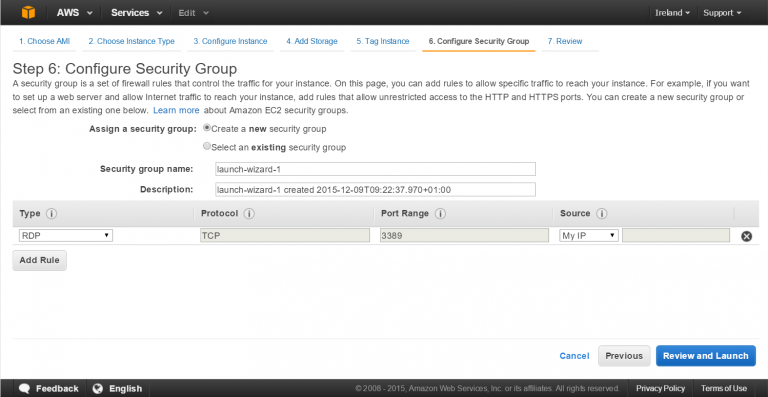
Step 6: We configure a new security group. We use our own ip address as we will only use this instance once:
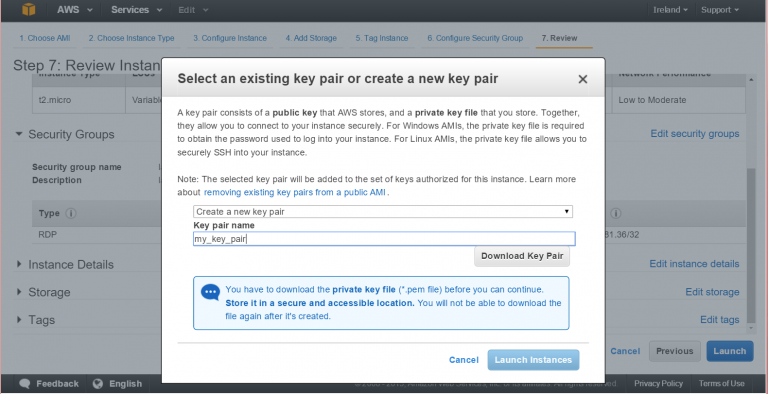
Step 7: Now we’re going to create and download our new key pair. Once we downloaded the key pair, we launch our new instance:
After launching our new instance, we go back to the instances screen. Here, we right click on our new windows image and choose ‘Get Windows Password’. We follow the instructions to retrieve the password.

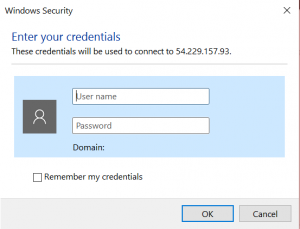
After we retrieve our password, we download the Remote Desktop (rdp) File…

…and login using Windows RDP…
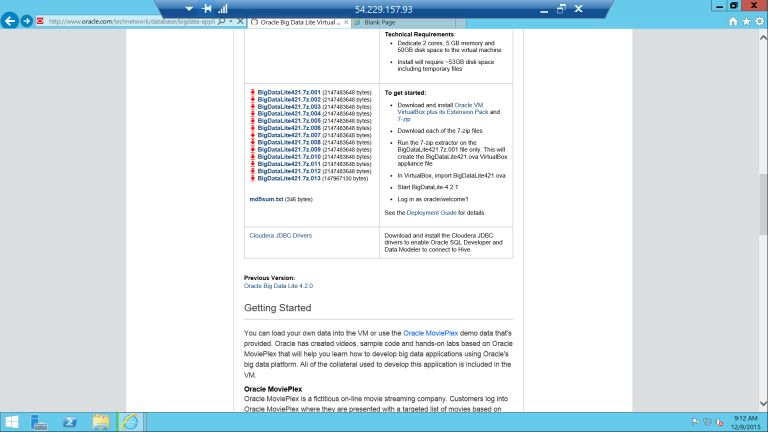
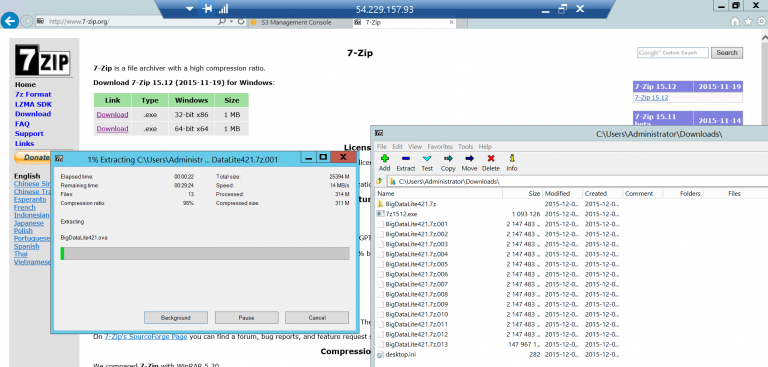
In the Windows environment, we install Chrome as Internet Explorer does not allow us (by default) to upload files bigger than 2 GB. The image of the Oracle Big Data Lite VM can be found here. First, download all 7-zip files from the Oracle website. This should not take more than about 15 minutes.
After the download has been finished, download 7-Zip and extract the OVA.
Now we login to Amazon and upload our newly created OVA file to S3.
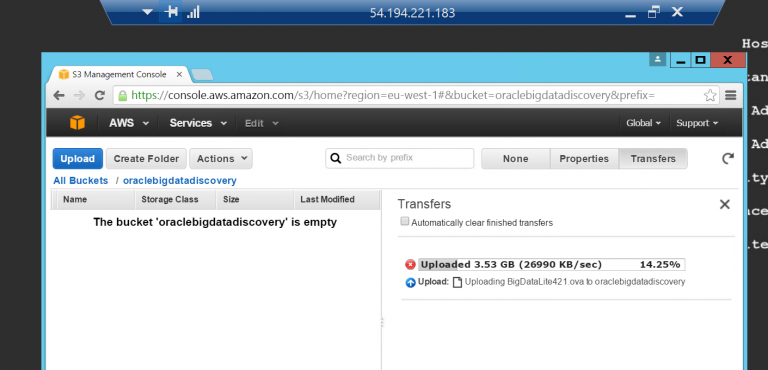
Once our upload has been finished, we terminate the Windows instance and delete the attached volume. If we don’t do this, we will end up paying for this instance.
Now.. import!
Time to import the VM from S3 into EC2. Follow the links to the Amazon website for instructions oninstalling and configuring the AWS Command Line Interface (CLI). After we configured the CLI, we follow the steps below to create the VM Import Service Role.
Step 1: Create a file named trust-policy.json with the following policy:
Step 2: Create a role with the name vmimport:
Step 3: We create a file named role-policy.json with the following policy:
Step 4: We attach the policy to the role created above:
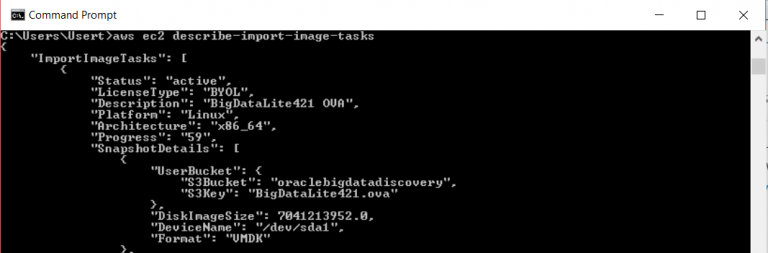
Now we are able to import our VM into Amazon EC2:
This takes about 20 minutes. To check the status of our import image task we type:
Launching the VM
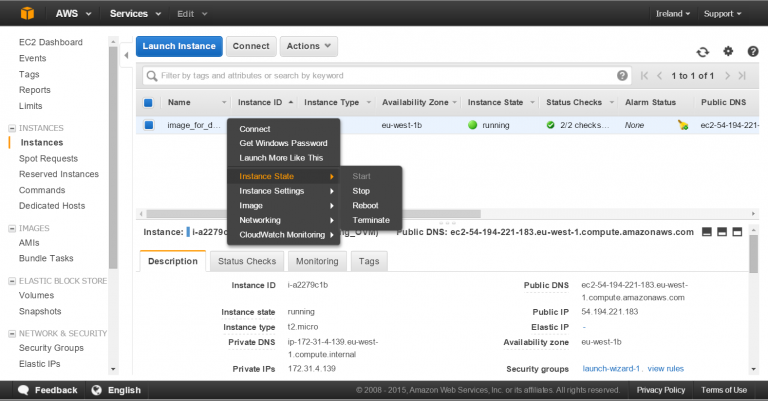
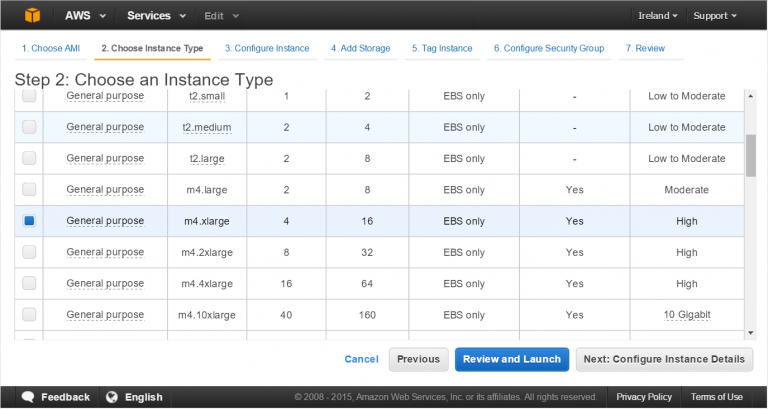
Now it is time to launch! We choose ‘Launch Instance’, and then pick our just imported image.
Choose an instance with a minimum of 16 GiB of memory.
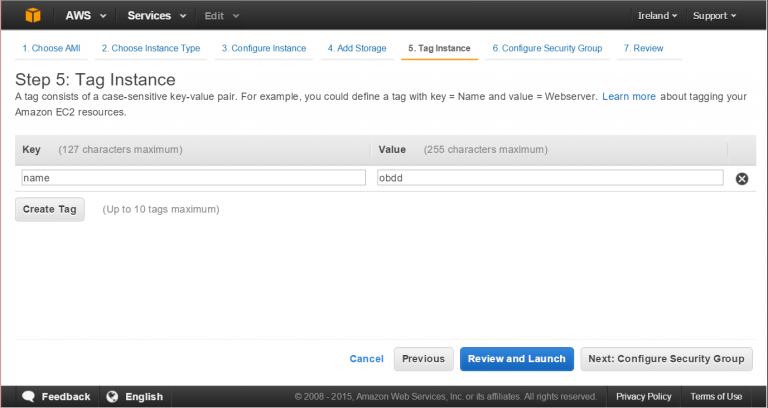
Now, click ‘next’ (2x). And tag your instance as obdd (oracle big data discovery).
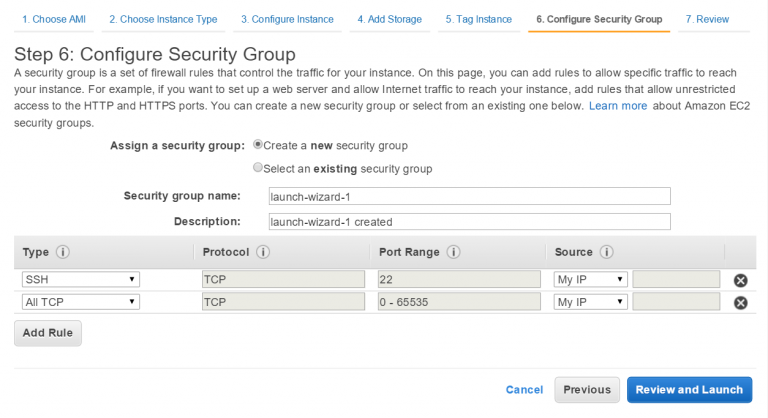
After this, we create a new security group and make sure to open the right TCP ports. For SSH we need port 22, for OBDD we need port 9003. We review our setup and launch the machine.
Final steps
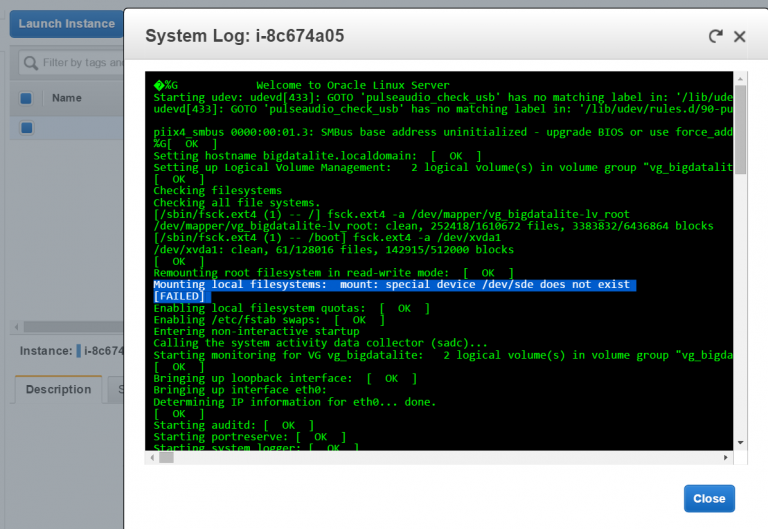
Although our machine should be running fine by now, this is not yet the case. When we check the System Log (right click on the instance ? Instance Settings ? Get System Log), we see that mounting the /dev/sde/ device failed.
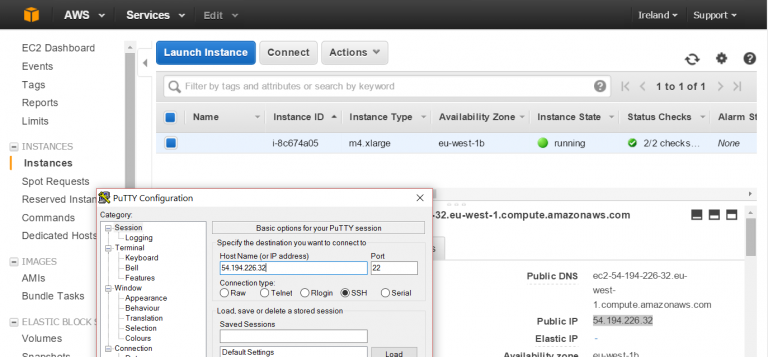
We connect to our instance using putty and login with the default username/password combination (oracle/welcome1).
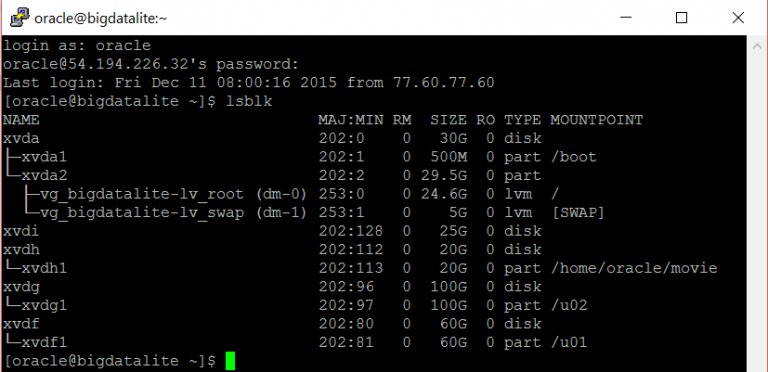
We issue the command lsblk and see that the xvdi mount is missing.
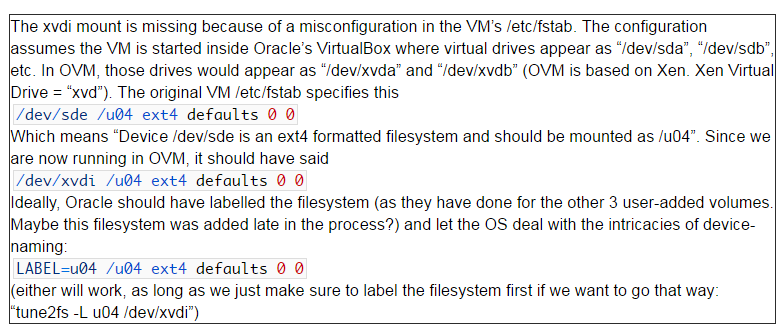
We add a label and then update fstab:
- Adding label: sudo tune2fs -L u04 /dev/xvdi
- Then we edit fstab: sudo vi /etc/fstab
And we make the following changes (start editing by typing ‘i’):
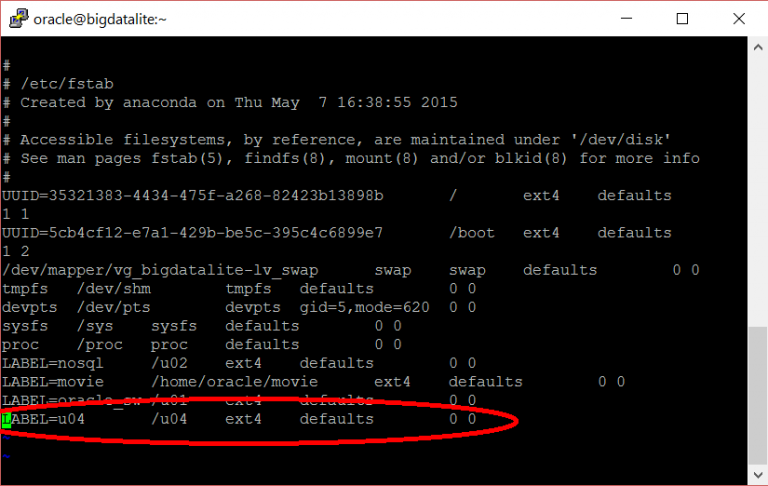
We save fstab and exit vi (type: [escape], [:], [w], [q], [enter])
- Now we mount the filesystem : sudo mount -a
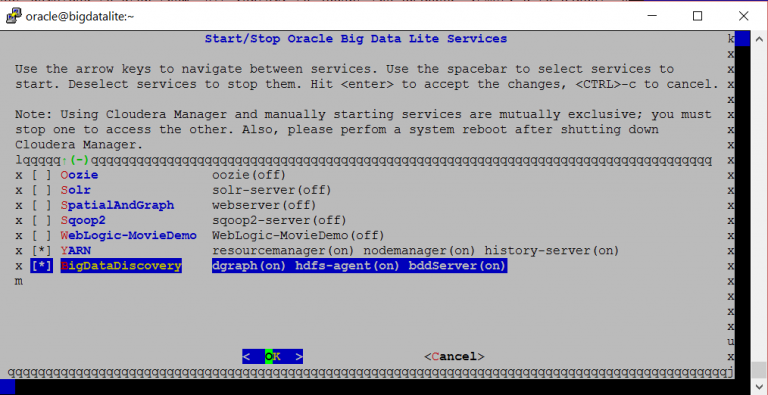
- And open the Oracle menu by typing : services

We choose BigDataDiscovery …
… and browse (after some minutes) to http://<ip-address>:9003/bdd
Mission completed!
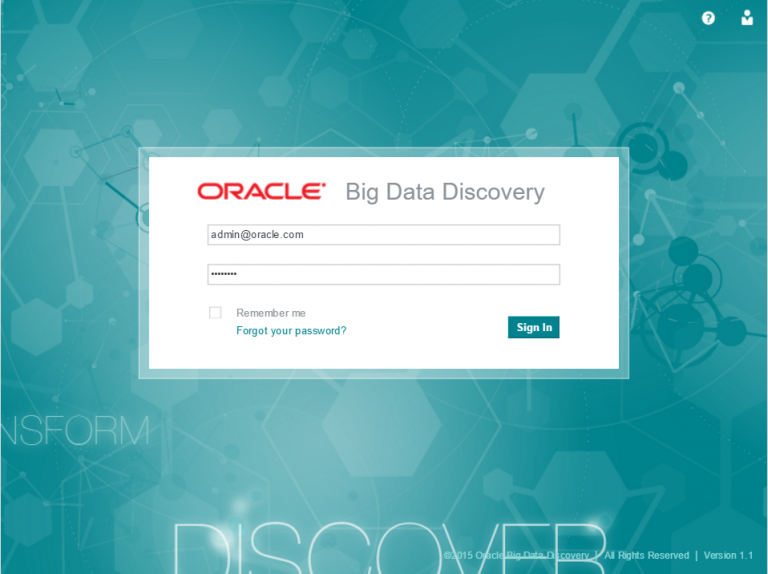
Login with admin@oracle.com / welcome1 and discover your data!

I hope you enjoyed following this tutorial. Feel free to leave a message in the comments!


Hello JOOST,
Thanks for your tutorial, but even after following every step you described I can't launch Big Data Discovery . the service Big Data Discovery is marked as launched in the console but there is no way to access it trough 9003 port. By the way a netstat command indicate nothing run on the 9003 port :-( .
I tried with your version (4.2.1) and most recent version and the pb remains : the big data discovery service is indicated as enabled (dgraph, hdfs-agent and BDDServer are on) but nothing on the 9003 port. Did you make additionnal step ?
Regards